
Desk setups · Buying guide
Best laptop desk setup: what to buy, skip, and upgrade first
A laptop desk can turn into a pile of upgrades that solve nothing. The hard part is finding the first real problem, then choosing the smallest setup that fixes it.
Solve only the bottleneck you have
Paid links. Gearsentials may earn a commission from purchases.
By Adam Anderson, Editor and CEO
This article contains paid Amazon links. Gearsentials may earn a commission from qualifying purchases. Affiliate standards.
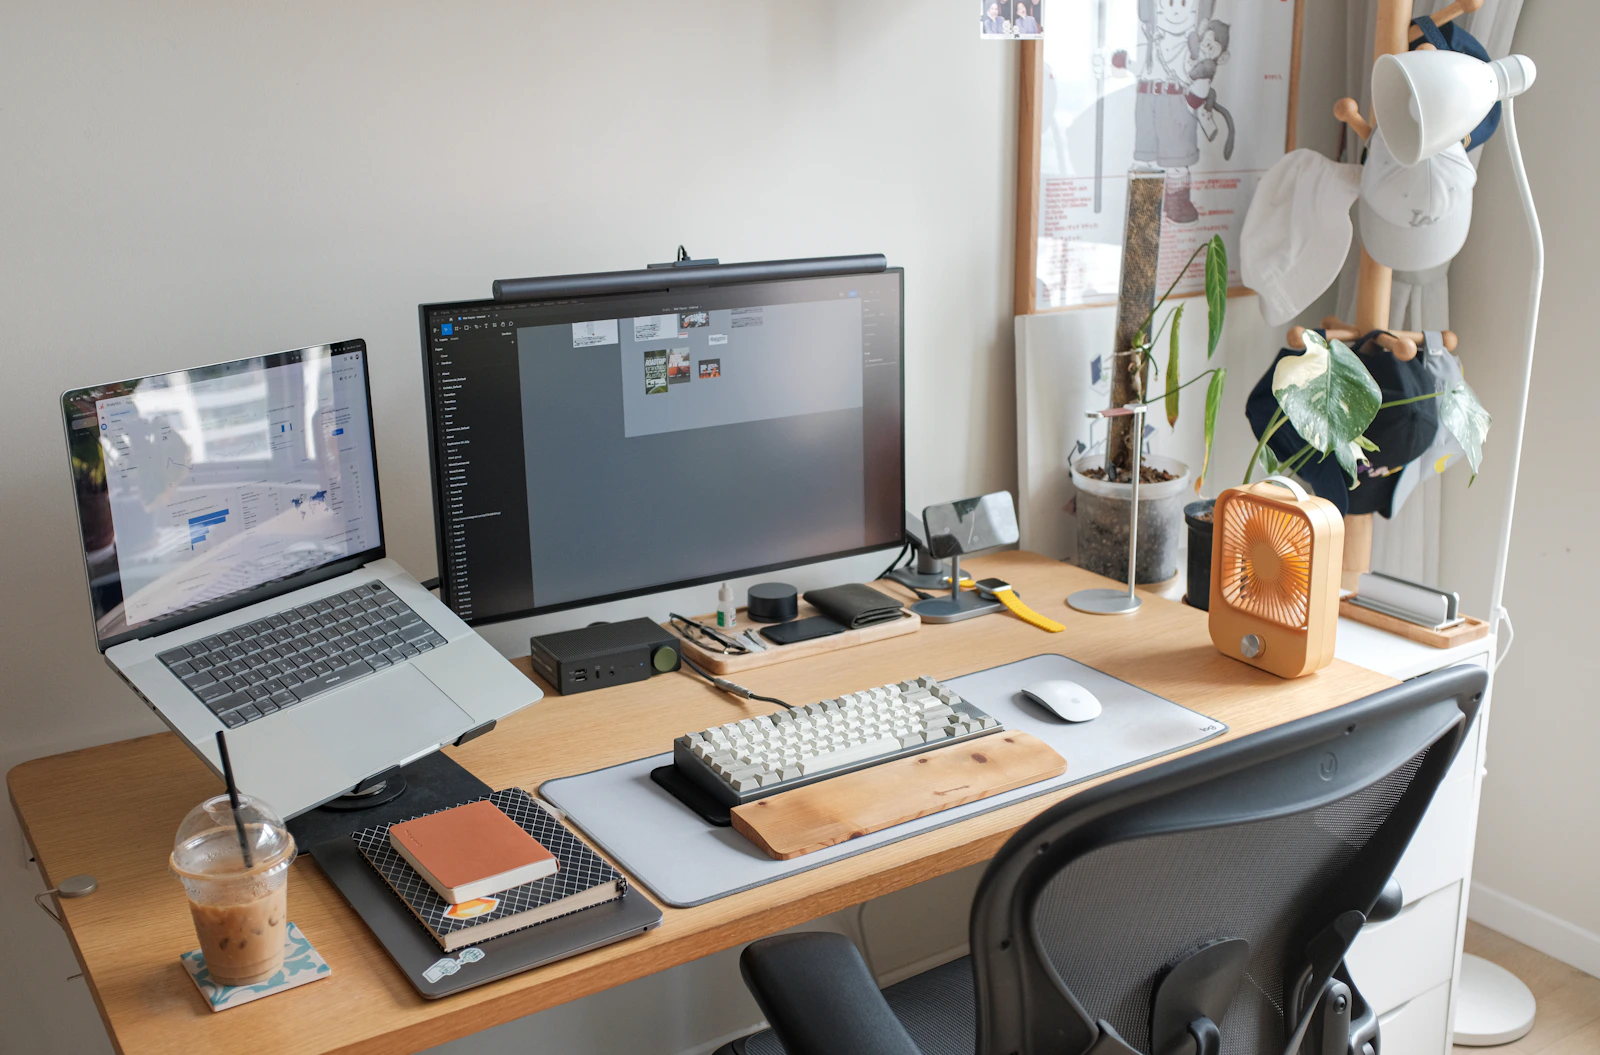
Check the laptop before buying anything
Write down the exact laptop model, not just “MacBook Pro” or “Windows laptop.” Display count, maximum resolution, charging behavior, and USB-C capability can change by model, chip, port, operating system, and whether the lid is open. Apple explicitly tells Mac owners to identify the model and then check how many displays it supports. Microsoft gives the same practical warning from the Windows side: a USB-C port, display, and cable all need the correct Alternate Mode for video.
This is the unglamorous part that prevents the expensive mistakes. Shopping first is how a beautiful dock ends up powering everything except the second monitor you bought it for.
Record these five facts before comparing accessories:
- The number and resolution of external displays you need.
- Whether a USB-C port supports video, charging, USB4, or Thunderbolt.
- The wattage of the normal or fast-charge power adapter.
- The peripherals that must remain connected every day.
- Whether one computer or two computers will share the desk.
That list is the specification for the desk. Without it, a 15-port dock can still fail to run the second monitor, and a 140W charger can still be unnecessary.
What to upgrade, in the right order
1. Make the chair and desk fit your body
Start with seat height, foot support, and elbow position. The goal isn’t a specific chair brand; it’s a stable posture with feet supported, shoulders relaxed, and forearms roughly level with the work surface. If raising the chair makes your feet hang, add a footrest before buying electronics. If the desk is too high, a keyboard tray may solve more discomfort than a premium mouse.
This is also the cheapest place to experiment. A firm footrest, adjusted armrests, and a clear area under the desk can change the setup without replacing the desk or chair. Change positions and take brief movement breaks through the day; no chair makes one frozen posture healthy indefinitely.
2. Raise the main screen
NIOSH recommends placing an external monitor about an arm's length away with the top at or just below eye level. A laptop on the desk usually makes the user look down, so choose one of two fixes: put the laptop on a stable stand, or make an external monitor the main display. The monitor earns its cost when you need more usable workspace, larger text, better color, or a clearer video-call view—not merely because every desk photo has one.
Keep the screen centered on the work you do most. A secondary display can sit to the side, but repeatedly turning toward the side monitor for primary work defeats the ergonomic improvement.
Before buying a stand, check:
- Height range at your actual chair and desk
- Stability while typing or adjusting the screen
- Laptop width, weight, ventilation, and hinge clearance
- Footprint, portability, and room for an external keyboard
Skip this purchase if: a monitor arm, books under a fixed display, or an existing shelf already puts the main screen at the right height safely.
3. Separate the keyboard and mouse from the screen
Once the laptop is raised, its built-in keyboard and trackpad are too high and too far away. Add an external keyboard and pointing device so the screen can stay elevated while the elbows remain near the body and the wrists stay neutral. Choose layout and comfort before features: the right size, key spacing, operating- system labels, and a mouse shape that fits your grip matter more than RGB lighting or a long shortcut list.
For two computers, prioritize reliable device switching. A multi-device keyboard and mouse can be simpler than adding a KVM, especially when the monitor already switches inputs. If you’re choosing between Logitech's current productivity-mouse packages, our MX Master 4 vs MX Master 4 for Mac comparison explains when the newer model is worth more.
Check keyboard width and number-pad need, operating-system layout, device switching, and whether Bluetooth or a dedicated receiver is more reliable in your environment. For the mouse, prioritize hand fit, grip, button placement, and the surfaces it must track on.
Skip this purchase if: the laptop remains flat and its built-in keyboard and trackpad are already comfortable for the amount of desk time involved.
4. Choose the monitor around text, scale, and connections
For everyday office work, resolution and comfortable scaling are usually more important than gaming refresh rates. Check the laptop's supported resolution and refresh rate, then decide how much screen space fits the viewing distance. A USB-C monitor is particularly useful because one cable can carry video, USB data, and laptop charging—but only if its power delivery is sufficient and its USB ports cover the peripherals you use.
Don’t assume the included USB-C cable supports every feature. Cables that look identical can differ in charging, data rate, and video support. Use the monitor's supplied full-featured cable or a cable explicitly rated for the required mode.
Compare monitors using this short list:
- Size and resolution at the planned viewing distance
- Comfortable operating-system scaling and text clarity
- Height, tilt, swivel, and VESA-mount options
- USB-C charging power, USB speed, Ethernet, and KVM needs
- The exact cable and input needed for the target refresh rate
Our Apple Studio Display vs ASUS ProArt PA27JCV comparison shows how scaling, built-in desk features, and connection paths can matter more than two similar-looking 5K specifications.
Skip this purchase if: raising the laptop solves the posture problem and its screen already provides enough usable space.
5. Pick one connection architecture
The connection plan determines whether the desk needs a hub, dock, or KVM. Start with the least complicated architecture that handles the full device list.
| Architecture | Best when | What it replaces | Main failure check |
|---|---|---|---|
| Laptop ports only | One display and a few direct connections | Nothing | Enough physical ports remain for charging and storage |
| USB-C monitor | One cable can handle video, charging, and basic USB gear | Separate charger and simple hub | Monitor power delivery and USB/Ethernet port list |
| USB-C hub | Travel or light desk use needs a few extra ports | Loose video and card adapters | Pass-through power, video mode, and 5/10Gbps limits |
| Thunderbolt/USB4 dock | Multiple high-bandwidth devices, Ethernet, audio, and displays stay connected | Several adapters and a separate connection hub | Host display limits, dock compatibility, and total bandwidth |
| KVM or monitor KVM | Two computers share one display, keyboard, and mouse | Manual cable swapping | Resolution, refresh rate, USB switching, and charging for both hosts |
The CalDigit TS4 is the mature Thunderbolt 4 dock option in this guide. It provides 18 ports, up to 98W for the host computer, and a 40Gbps Thunderbolt 4 connection. Its 2.5Gb Ethernet mode requires a Thunderbolt host and compatible network equipment. Its real value is keeping displays, fast storage, Ethernet, audio, card readers, and USB devices attached to one permanent desk. It’s overkill for a laptop, one 4K monitor, and a wireless mouse.
Display support still depends on the computer. A dock doesn’t add display capability that the laptop or operating system can’t provide, and USB4 or older USB-C hosts can cap features below the TS4's headline specifications. CalDigit also sells newer TS5 and TS5 Plus Thunderbolt 5 docks, so a Thunderbolt 5 computer or a workflow built around faster external storage deserves a current range comparison. Our USB-C dock vs Thunderbolt dock guide covers that compatibility decision, and our Anker 575 vs CalDigit TS4 comparison covers the less-expensive dock path.
Mature Thunderbolt 4 option
Paid links. Gearsentials may earn a commission from purchases.
Opens the exact CalDigit TS4 B09GK8LBWS listing. Confirm the selected model and condition before buying.
Best for: A permanent Thunderbolt desk with several high-bandwidth peripherals and a host that can use them. Skip if: A USB-C monitor, small hub, or the laptop's direct ports cover the list, or a Thunderbolt 5 workflow needs a newer dock.
6. Add power only after the connection plan is fixed
A USB-C monitor or dock may already charge the laptop. If it does, a separate charger should solve another problem: charging a phone, tablet, headphones, camera, or second computer at the same time. Add the simultaneous loads, not every device you own, and check both the charger's total output and its per-port allocation.
The Anker Prime 160W A2687 is a three-USB-C wall charger with a 160W shared ceiling and up to 140W through standard USB PD 3.1 EPR on one port. Reaching 140W requires a compatible laptop and an EPR 140W/240W USB-C cable or USB-C-to-MagSafe 3 cable, depending on the computer. The charger shares its 160W total when more than one port is active; dynamic reallocation is available in AI Mode 2.0. It includes no USB-C cable. That makes it a strong fit for one high-power laptop plus two smaller devices whose simultaneous demand fits that shared budget. It’s unnecessary for a sub-100W laptop plus a phone when a smaller charger already covers both. Gaming laptops that require a proprietary high-power adapter may still need their original brick. Our Anker Prime 160W vs 200W comparison covers when a corded desktop charger is the better architecture.
High-power three-device option
Paid links. Gearsentials may earn a commission from purchases.
Opens the exact Anker Prime 160W A2687 B0F9NK4M7Q listing. Confirm the selected model and condition before buying.
Best for: One compatible 140W-class laptop with the correct cable plus two smaller devices within the shared 160W budget. Skip if: The dock or monitor powers the laptop and the existing phone charger handles the remaining load.
7. Treat storage and backup as different jobs
Buy portable storage when local capacity, project transfers, or a real backup routine requires it. Match the drive to the actual connection path: a 20Gbps USB 3.2 Gen 2x2 SSD can’t reach its headline speed through a 10Gbps dock or a computer without Gen 2x2 support. For many laptop desks, a good 10Gbps SSD is the more sensible purchase.
One external SSD isn’t a complete backup. It can fail or disappear with the computer. Keep an independent second copy or cloud backup, automate the schedule when possible, and test a restore before the files matter.
8. Finish with calls, lighting, and cable control
Use the laptop's camera and microphone first. Add a webcam when the laptop must sit closed, the camera angle is poor, or calls are frequent enough that framing and image quality matter. Add a USB microphone or headset when people can’t hear you clearly. A lamp aimed at your face often improves video more than replacing a decent camera.
Cable management comes last because the final connection plan determines which cables stay. Route power separately from devices you unplug, leave enough slack for a sit-stand desk, label unusual cables, and mount only equipment that has earned a permanent place. A clean desk is the result of fewer necessary connections, not a bag of clips hiding unnecessary ones.
Four laptop-desk connection plans
Lean desk: one laptop, no permanent dock
- Laptop stand or external monitor at a comfortable height
- External keyboard and mouse
- Direct laptop charging
- One display cable or a small USB-C hub only when needed
This is the default recommendation. It’s inexpensive, easy to troubleshoot, and leaves no expensive dock idle on a desk that uses two ports.
One-cable desk: monitor first
- USB-C monitor with sufficient laptop charging
- Keyboard, mouse, webcam, or Ethernet connected to the monitor
- One full-featured USB-C cable to the laptop
- Separate charger only for devices the monitor can’t cover
This setup can deliver the convenience people expect from a dock without adding another box. Verify the monitor's USB speed, Ethernet, and power delivery before assuming it replaces a dock.
Demanding permanent desk: dock first
- Thunderbolt laptop with verified display support
- Premium dock for several displays or high-bandwidth devices
- External input devices, Ethernet, audio, and storage left connected
- Separate multiport charger only when simultaneous device load exceeds dock power
This is where the CalDigit TS4 makes sense. The dock is buying connection density and bandwidth, not better posture or a faster laptop.
Two-computer desk: switch the whole path
- Monitor with a built-in KVM, or an external KVM that supports the required resolution and refresh rate
- A verified charging plan for each computer; a KVM may not power both hosts
- Multi-device keyboard and mouse, or USB peripheral switching through the KVM
- Manual monitor-input switching when only the display needs to be shared
Start with a monitor KVM when its inputs, USB ports, and charging match both computers. Use an external KVM when they don’t. Verify operating-system support, display bandwidth, wake behavior, and charging for both machines before buying; a multi-device keyboard and manual monitor switching may solve a simpler work-and-personal setup for less.
What should you buy next?
| Repeated problem | Buy next | Verify first | Don’t buy when |
|---|---|---|---|
| Neck and shoulder strain | Stand or monitor, then external input | Screen height, viewing distance, elbow position | The discomfort comes from chair or desk height |
| Too little screen space | External monitor | Laptop display count, resolution, refresh rate, video port | Better window management solves the real issue |
| Daily adapter shuffle | USB-C monitor, hub, or dock | Complete port list, charging, displays, bandwidth | Direct laptop ports cover the setup |
| Several devices compete for power | Multiport USB-C charger | Simultaneous loads, per-port allocation, cables | The monitor, dock, and existing bricks already cover them |
| Files don’t fit or backups are manual | Portable SSD plus independent backup | Capacity, interface speed, format, restore plan | Cloud or network storage already solves the job |
| People can’t see or hear you | Light, headset, webcam, or microphone | Which part of the call is actually failing | A better camera angle or quieter room fixes it |
| Work and personal computers share the desk | Monitor KVM, external KVM, or multi-device input | Resolution, refresh rate, USB switching, and charging for both hosts | Manual monitor-input switching covers the workflow |
| Cables and equipment consume a small desk | Monitor arm, vertical laptop storage, or under-desk tray | VESA support, weight limits, ventilation, cable slack | The connection architecture or desk layout is still changing |
The verdict
The best laptop desk isn’t the one with the most accessories. It's the one that puts the screen and controls in comfortable positions, connects reliably, and removes repeated friction with the fewest boxes. Start with posture and input. Let the monitor determine whether a hub or dock is still necessary. Add power, storage, and call gear only when you can describe the failure they solve. A quieter desk usually starts with fewer boxes, not better boxes.
Solve the bottleneck you actually have
Paid links. Gearsentials may earn a commission from purchases.
Opens the exact CalDigit TS4 and Anker Prime 160W A2687 listings. Confirm the selected model and condition before buying.
Best for: CalDigit TS4 for a demanding permanent desk; Anker Prime 160W for one high-power laptop plus two smaller USB-C devices. Skip if: You can’t name the repeated connection or charging problem the product will remove.
FAQ
Should I buy a monitor or a laptop stand first?
Buy the option that puts the main screen at a comfortable height without forcing the keyboard and trackpad into an awkward position. A stand is the less expensive fix when the laptop screen is large enough. A monitor is the better fix when you need more workspace, clearer text, or a larger video-call view. Either choice works best with an external keyboard and mouse.
Do I need a dock if my monitor has USB-C?
Not necessarily. A USB-C monitor that supplies enough charging power and has the ports you use can already be the desk's connection hub. Add a dock only when the monitor lacks the display, Ethernet, storage, card-reader, audio, or peripheral connections your workflow needs.
Can every USB-C laptop connect to a monitor?
No. The laptop port, monitor input, and cable all need to support the required video path. A USB-C-shaped port may provide data or charging without DisplayPort Alt Mode or Thunderbolt display support. Check the exact laptop model and port documentation before buying a monitor, hub, or dock.
Is one external SSD enough for backup?
No. One external drive can be one copy, but it can be lost, damaged, stolen, or corrupted with the laptop. Keep another independent copy or a reputable cloud backup, and periodically confirm that important files can be restored.
How much USB-C charging power does a laptop desk need?
Start with the laptop manufacturer's normal or fast-charge requirement, then list the devices that charge at the same time. A dock's host-power number may cover the laptop by itself. A separate multiport charger is useful only when the desk also needs to charge phones, tablets, headphones, cameras, or another computer.
Sources
- NIOSH working-from-home ergonomics guidance
- OSHA computer-workstation purchasing guide
- Apple guidance for connecting displays to a Mac
- Microsoft USB-C compatibility troubleshooting
- CalDigit TS4 product specifications
- CalDigit TS4 user manual
- CalDigit current dock range
- Anker Prime 160W A2687 product page
- Anker Prime 160W support specifications
- Anker 140W charging requirements
- Samsung T9 USB 3.2 Gen 2x2 data sheet
- NIST backup and recovery guidance